
To buy your tropical waterlilies please click to this link: Tropical waterlilies on sale
Differences in Purchase Options: Plant or Bulb.
Tropical water lilies can be purchased as a grown plant or as a bulb. The grown plant can only be received from May/June, while the bulb can be obtained year-round.
The plant is placed directly in the pond or container following the instructions below, while growing a plant from a bulb, you can plant it directly or anticipate growth by placing it in a heated environment. All the information can be found in this article..
Preparing a grown tropical water lily
Initial Care After Receiving Your Plant
When you receive your tropical waterlily, there are crucial steps to follow immediately to ensure its survival and successful planting:
- Carefully inspect your plant upon opening the package. If you notice any damage or signs of illness, contact your supplier immediately.
- Keep the entire plant moist at all times after unpacking:
- The roots must stay wet
- The stems must remain moist
- The undersides of the pads (leaves) need constant moisture
Important: A common mistake is only keeping the roots and base of the stems in water while letting the rest of the plant dry out. This can harm the plant.
Temporary Storage
Before planting, store your waterlily properly:
- Choose a shaded location on the side of your house
- Place the plant in pond water
- Cover the protruding parts with damp newspaper to keep everything moist
- Ensure the plant remains in shade until planting
Planting Instructions
Planting Depth and Medium
- Use either heavy or loam soil as your planting medium
- Create a hole in the center of your pot (unlike hardy waterlilies, which are planted toward the edge)
- Plant the rhizome vertically in the center of the pot
Critical Planting Tips
- Do not cover the crown (where roots meet the stem) with soil
- This allows new growth to reach the surface unimpeded
- Place the pot in 6-12 inches of water
- This depth is crucial because:
- Air bubbles in the plant can cause it to float if planted deeper
- Deeper planting may pull the plant from the soil
Important Don’ts
- Avoid using stones to weigh down the roots as this can:
- Kill the plant
- Inhibit growth
- Instead, use sand on top of the soil, which allows new growth to push through
Ongoing Care
Fertilization Schedule
- Fertilize every 15 days
- Use specialized water lily fertilizer like pondtabbs, pondtabbs plus (the best for tropical waterlilies)
- Consistent fertilization during growing season promotes daily blooming
Water Depth Maintenance
- Maintain 6-12 inches of water depth
- Monitor water levels regularly
- Adjust as needed to maintain optimal growing conditions
With proper care and maintenance following these guidelines, your tropical waterlily should thrive and produce beautiful blooms throughout the growing season.
To buy your tropical waterlilies please click to this link: Tropical waterlilies on sale
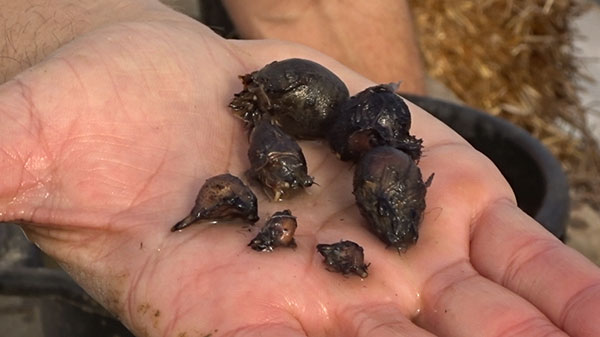
Preparing a Tropical Water Lily from a Bulb
Phase 1: Initial Planting (in spring, but the bulb can be purchased year-round)
- Prepare the pot: Take a small pot (4-6 inches/10-15cm) and fill it with clay soil.
- Add fertilizer: Insert a pondtabbs fertilizer tablet (specifically for aquatic plants) into the soil. This will provide the necessary nutrients for the bulb.
- Plant the bulb: Gently bury the bulb in the clay soil.
- Temperature: To help the bulb germinate, you need warm water. You can use a heated aquarium or an aquarium heater to maintain the ideal water temperature in the container.
- Light and water: Submerge the pot in water to a depth of about 8-12 inches/20-30 cm. Place everything in a very bright location.
Phase 2: Growth and Development
- Repotting (when the first flower appears): When you see the first flower sprout, it’s time to transfer the plant to a larger container. Add more pondtabbs to the new pot.
- Pot choice and depth: Use a pot of adequate size for the water lily. The larger the pot, the more the plant will grow. For tropical water lilies, it is not necessary to submerge them too deeply; 8-12 inches/20-30 cm deep is sufficient, because the surface water is warmer and promotes growth.
- Substrate: The ideal soil is composed of clay soil, or a mixture of clay soil and sand. For optimal growth and flowering, fertilize the soil with pondtabbs regularly, at least every 15 days.
Phase 3: Ongoing Care
- Sunlight: Make sure the plant receives plenty of direct sunlight.
- Cleaning: Remove old leaves, even if they are not completely dead. This stimulates the plant to produce new flowers.
Extra tips:
- Always use specific aquatic plant fertilizer such as pondtabbs for vigorous growth and flowering.
By following these simple steps, you can enjoy the beauty of your tropical water lily flowers. In short:
- Initially: small pot, clay soil, pondtabbs, water at 8-12 inches/20-30 cm depth, plenty of light, and warm water.
- After the first flower: larger pot, more pondtabbs, depth always 8-12 inches/20-30 cm, clay soil (or mixed with sand), and regular fertilization.
- Always: plenty of sunlight and removal of old leaves.
To purchase your tropical water lilies, click on the following link: Tropical water lilies for sale
At the end of the flowering season, tropical water lilies, especially in colder areas, should be brought indoors to avoid losing them. Below is a video and tutorial where I explain how to retrieve tropical water lily bulbs:
Click here for the blog tutorial on how to overwinter tropical water lilies.
Recent Comments